Tech Walkthrough: Compiling Aseprite from Source - A Step by Step Guide
2025-07-13
What Is Aseprite?
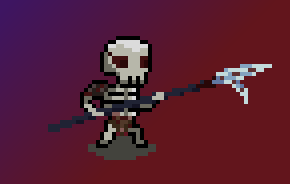
Aseprite is a beloved open-source pixel art tool used by indie game developers, artists, and hobbyists to create animated sprites, tilesets, and game assets. With its frame-by-frame animation timeline, intuitive interface, and customizable workflow, Aseprite has become a de facto standard for pixel art in indie game development.
You’ve probably seen its touch in acclaimed indie titles like:
- Celeste – the critically acclaimed platformer with lush pixel landscapes and emotional storytelling
- Dead Cells – a rogue-lite action game with fluid animation and vibrant pixel visuals
- Starbound – a sprawling sandbox exploration game
Whether you're designing assets for Unity or Godot, or just experimenting with pixel art for fun, Aseprite offers the flexibility and precision artists love, inspired by the charm of the classics.
Supporting the Aseprite Team
I bought two copies of Aseprite, one for myself and one for my wife, and we often used it together at home for our own creative projects. Before long, our kids (11 and 8) started watching, then drawing, animating, and experimenting on their own. They were just having fun and learning, not doing any commercial work, so compiling an open-source build made sense for them.
That said, I want to be very clear: Aseprite deserves your support. The developers allow compiling from source under their license, and this guide is not about avoiding payment. If you use Aseprite for serious, professional, or commercial work, you should buy a license. It directly supports the team and keeps this excellent tool alive.
You can support Aseprite here:
Tools and Dependencies You’ll Need
We will need a handful of essential tools and libraries to compile Aseprite from source. Here is a list of them and don't worry, we will cover them one by one in the following sections.
Build Essentials
- CMake: for configuring the build system
- Python(3.x): needed by Skia build scripts
- Git: to get the source code of Aseprite
- Depot Tools: for managing dependencies across multiple Git repositories
Compiler Options
- C++ Compiler, such as
- MSVC: for Windows systems and we will use this in this walkthrough
- Clang: better performance than MSVC, recommended for macOS
- GCC: for Linux systems
Graphics Backend
- Skia: Google's 2D graphic library that Aseprite relies on
- We need to build Skia separately from binary
- This is the most important dependency for Aseprite
System Considerations
- Operating System: My OS is Windows, if your system is different, then choose a different C++ compiler mentioned previously
- RAN: 8GB should be enough
- Disk Space: While Aseprite itself is about 25 MB, but tools and dependencies required is about 10 GB lol 😂
Step 1️⃣: Installing Visual Studio 2022 Community Edition on Windows
To compile Aseprite, we will need a C++ development environment, so we will get the Visual Studio Community Edition 2022, which is free for individual use.
1.1 Download the Installer
- Head to the Visual Studio Community download page and grab the installer.
1.2 Run the Installer
- Launch the downloaded
.exefile and follow the prompts.
1.3 Select Workloads
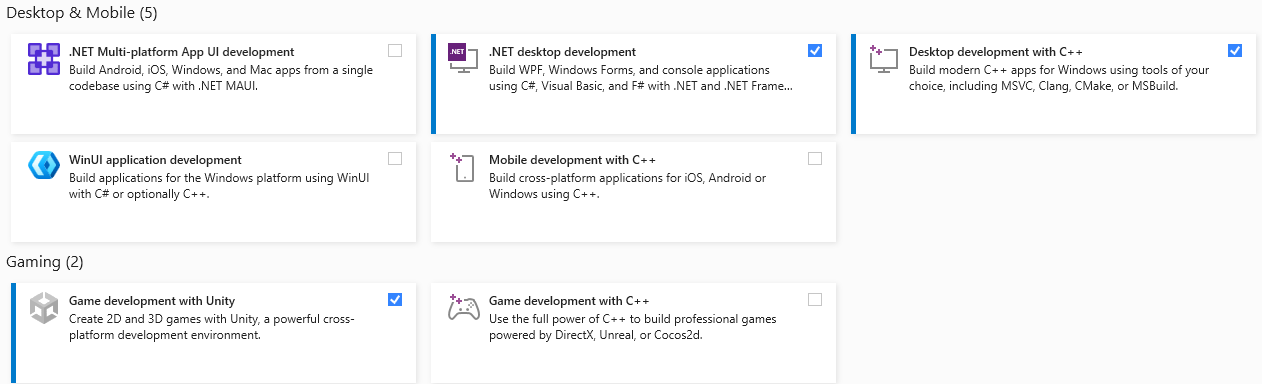
- Choose Desktop development with C++. This includes the MSVC compiler, Windows SDK, and build tools required for Aseprite.
- Optionally, you can also select .NET desktop development and Game development with Unity, this includes support for C# and necessary tools for working with Unity.
In fact, this is not optional, I mean you want to build some games in Unity and/or Godot, don't you? 😎
1.4 Install and Wait
- Click Install and let Visual Studio do its thing. It may take a few minutes depending on your internet speed.
Step 2️⃣: Install and Configure Git
If you're not a developer and just want to download Aseprite's source code without diving into complex Git setups, worry not! Git can be run in a way that's beginner friendly and doesn’t require keys, terminal magics, or secret handshakes. So, let's get to it!
2.1 Download Git for Windows
- Visit git-scm.com
- Go to Download and click Download for Windows, then run the installer and leave most settings at their defaults
2.2 Sign up Github (Optional, as all repositories we clone are public, so we can clone them without signing up)
- If you have Google Account (you do, right? LOL 😆), then simply visit GitHub Sign in page, and click
Continue with Google, then follow the prompts.- if you don't have, then you can visit the GitHub main page to sign up.
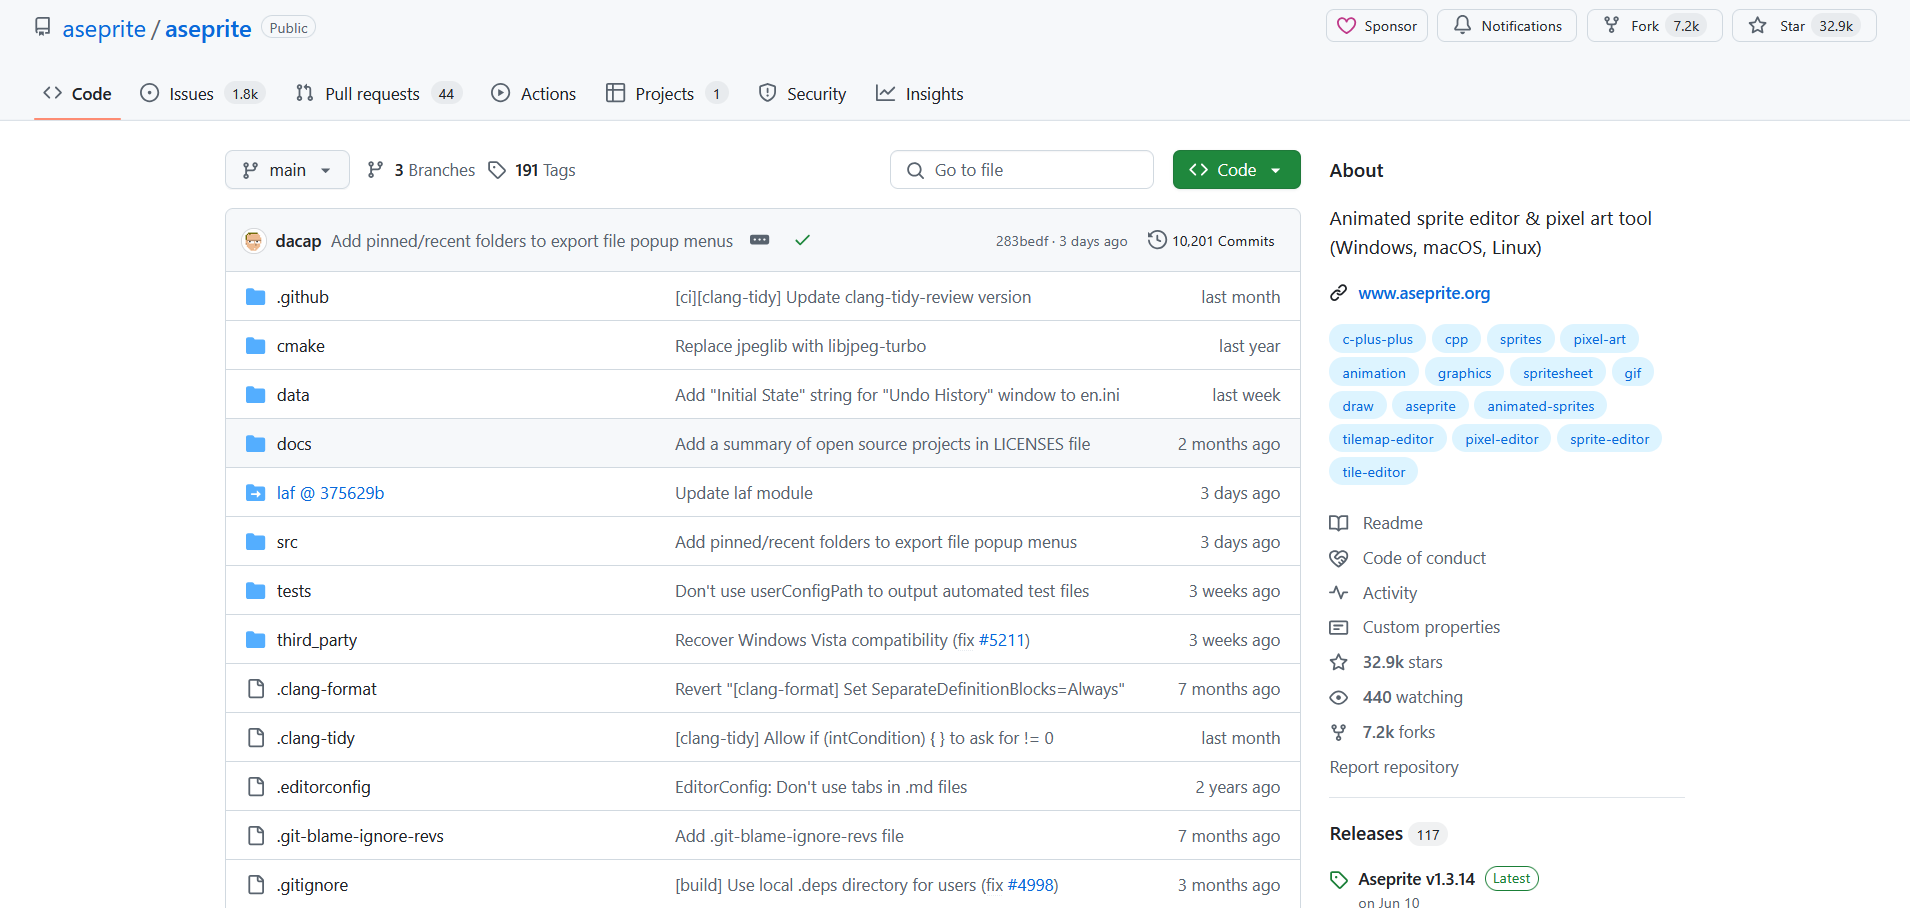
Step 3️⃣: Get the Aseprite Source Code
Now we need to grab the source code of Aseprite from its repository. There are two ways to do this:
- Using Git or
- Downloading the
Aseprite-v1.x-Source.zipfile from the lastest Aseprite release (Not Recommended)
Using Git
If you have Git installed on Windows, go to your desired folder(e.g. C:\aseprite), then Right Click -> Show More Options -> Open Git Bash Here then get the Aseprite Scource code by executing:
git clone --recursive https://github.com/aseprite/aseprite.git
Git may ask you to enter your GitHub username and password the first time you pull code.
This will pull the Aseprite code along with its internal dependencies like laf,pixman,and freetype.
If you have already cloned the repository without
--recursive
you can fix this by running:
git submodule update --init --recursive
Downloading the source file directly
This is NOT the recommended way for getting the Aseprite source file, as you have to fetch Aseprite's internal dependencies by yourself, which is very risky and error prone! I will not cover how to get those dependencies in this tutorial.
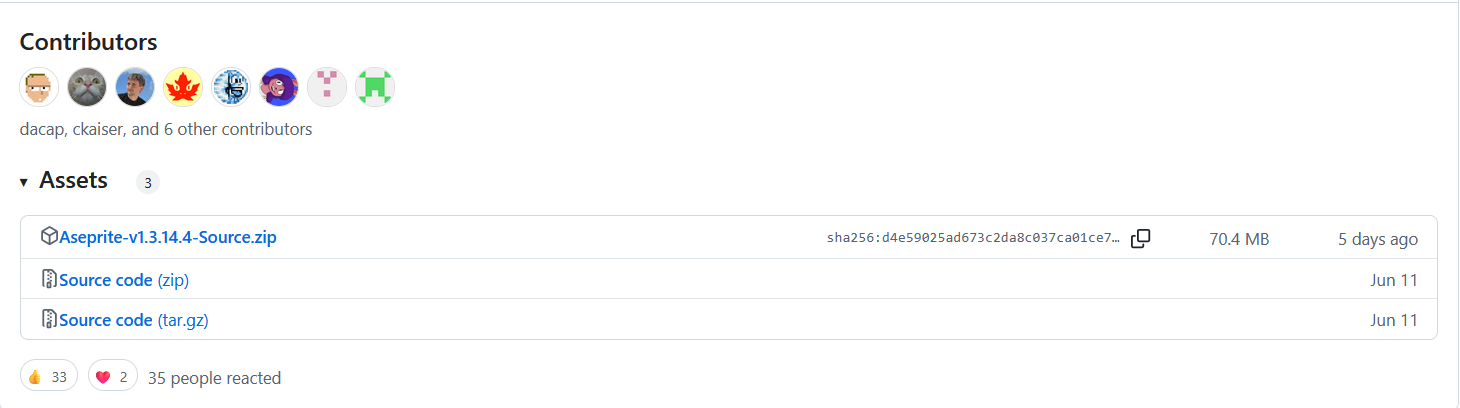
Go to the Aseprite repository, then click on the Latest button, at the time of writting this blog, it is version Aseprite v1.3.14.
 Then scroll all the way down, you will see several files, click the
 Aseprite-v1.x-Source.zip to download the source files.
 Extract the files from the
 Aseprite-v1.x-Source.zip. For this, you can use 7zip or whatever app you prefer.
Now you have to follow the instructions inside the extracted folder to fetch all the internal dependencies, that's why this is really NOT the recommended way to go.
Step 4️⃣: Get CMake, Python 3.x and Depot Tools
Now we need getting more tools for compiling our Aseprite 😊. So, let's get CMake, Python 3.x and Depot Tools.
CMake
CMake can be downloaded directly from its download page, remember to grab the correct version for your system!
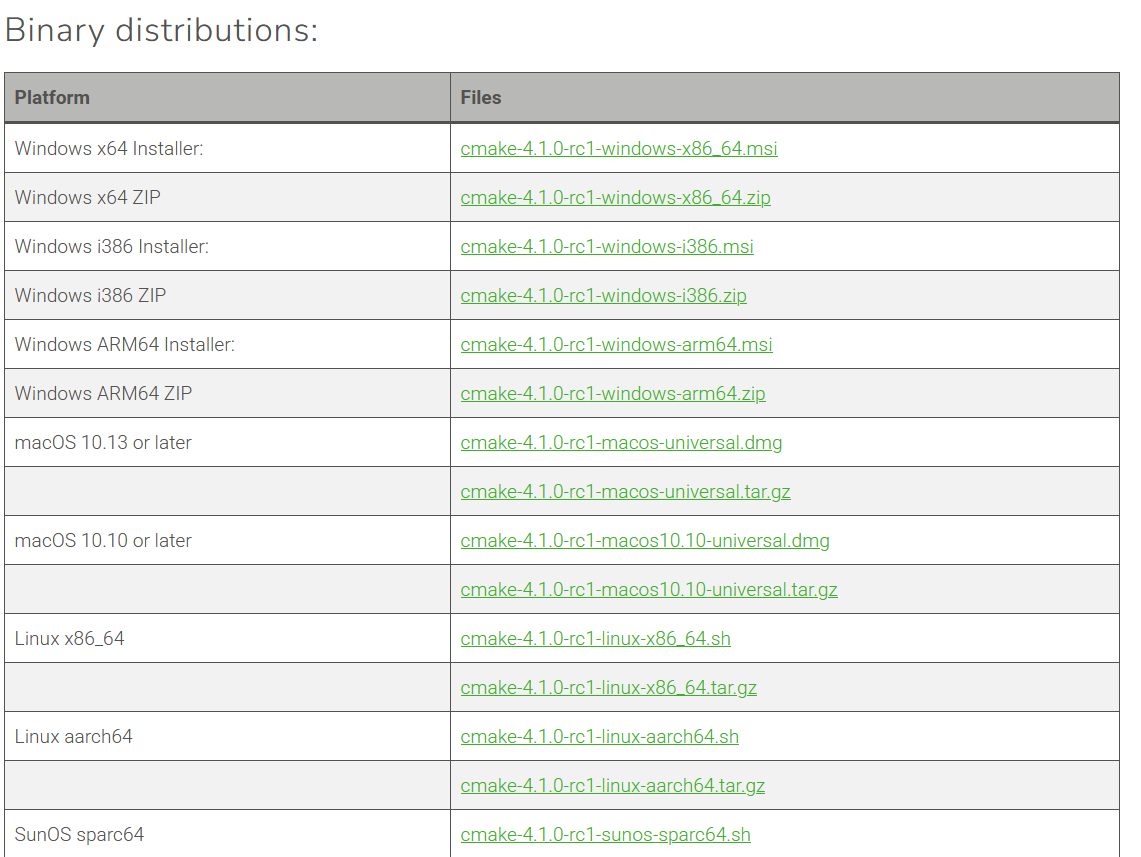 For me, it is the
 Windows x64 Installer: cmake-4.1.0-rc1-windows-x86_64.msi.
After you have the installer downloaded, simply execute it and follow the prompts.
Python 3.x
Visit the Python.org and download the lastest version of Python. At the time or writing this tutorial, it is Python-3.13.5.
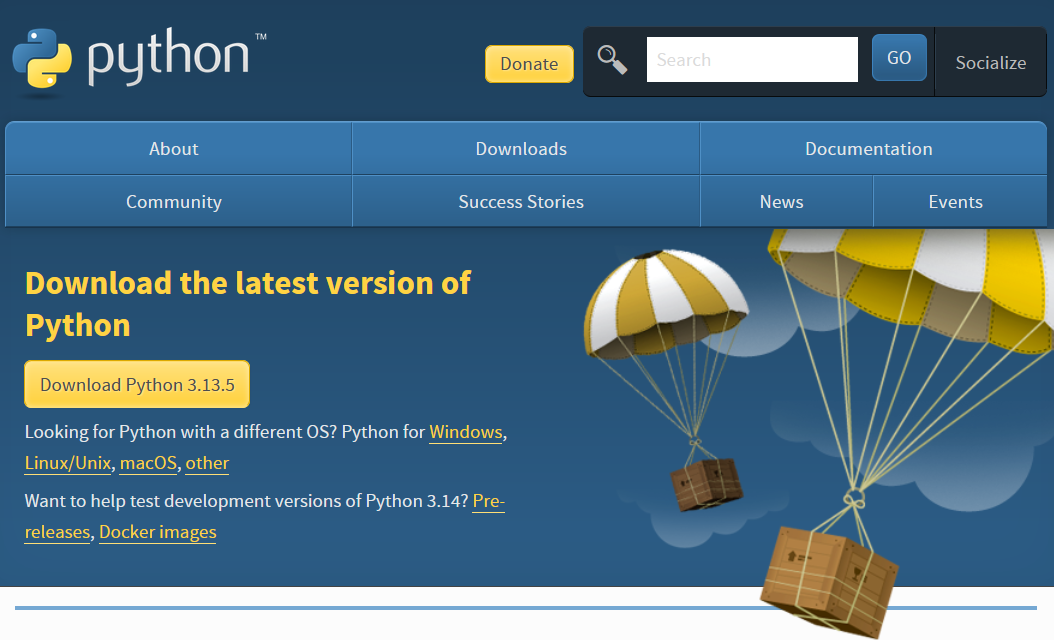 After you have the installer, simply execute it and follow the prompts. Remember to check the Add Python.exe to PATH in the installer.
Google Depot Tools
Simply visit the Depot Tools Download link to directly download from Google. Or, you can visit the Depot Tools tutorial page to follow the official manual.
After you have the depot_tools.zip file, it is recommended to extract its contents to a folder such as C:\dependencies,
so it becomes C:\dependencies\depot_tools. Or ofc, you can extract it to wherever you want, just keep in mind that we need its path soon.
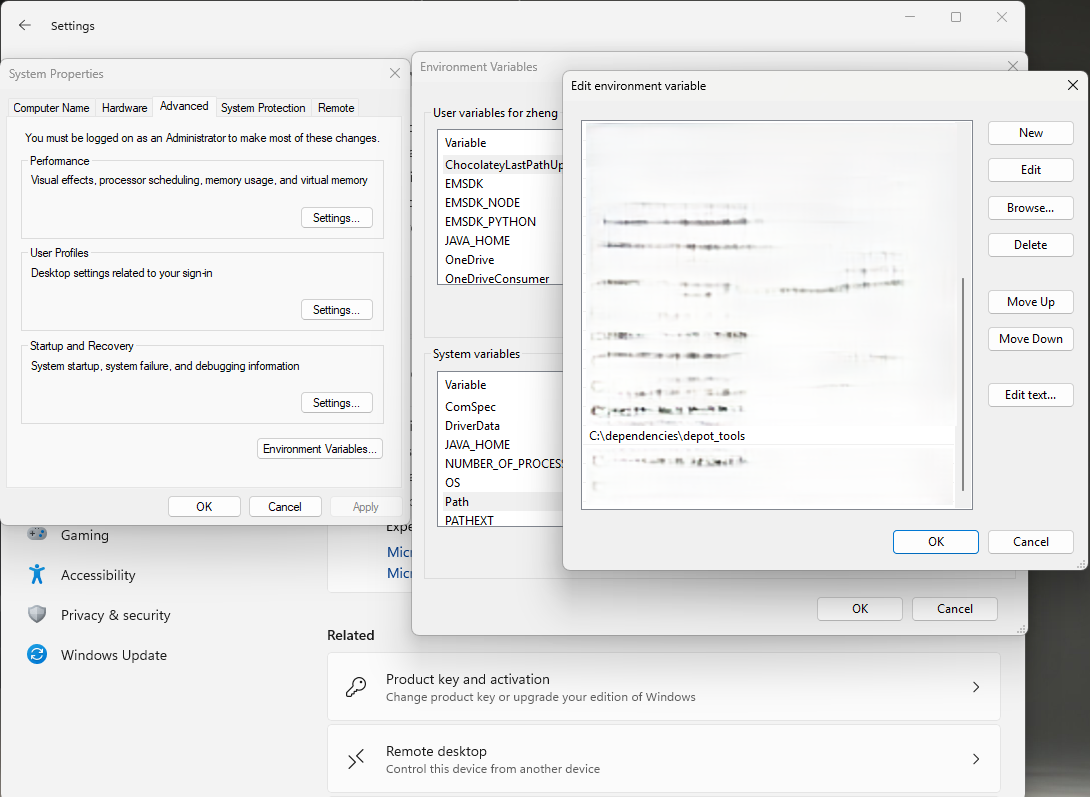
So after you have extracted depot_tools, we need to add it to SYSTEM PATH so our system knows where it is.
To achieve this, we need to open Windows Settings, then
System -> About -> Advanced system settings
Then on the Advanced tab, click Environment Variables. This will open another window where there are two sections, User variables for "your username" and System variables. We need to scroll down in the System variables, and find Path. Double click it , then click New.
Now we need to copy and paste the path of the depot_tools, which is C:\dependencies\depot_tools, or whatever you have set it to be ☺️.
After this, click OK, then Ok, then Ok. Yes Triple OKs 😆.
Step 5️⃣: Get Skia (and successfully compile it)
Now comes the big guy we have been prepping for, aka. Skia! This is the most important part of this tutorial. In fact, most of the tools, dependencies we have set up in previous steps, are meant for compiling Skia. A (successfully) compiled Skia is about 10 GB while Aseprite is 25 MB 😆. But yes, I mean we need this!
Let's get the source files of Skia first. Go to C:\dependencies (or wherever you want Skia to be), then
Right Click -> Show More Options -> Open Git Bash Here
and execute this in the terminal
git clone -b aseprite-m124 https://github.com/aseprite/skia.git
This will download the Skia source files from the branch specifically meant for Aseprite.
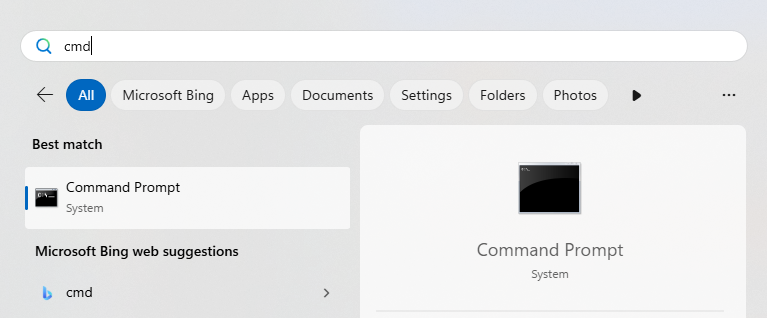
After this we need to execute a series of commands, however this is not done in the terminal where we just ran git, but we need to open the Windows Command Prompt by clicking windows start, then search for cmd, right click on it and then Run as administrator.
Then we need to run
call "C:\Program Files\Microsoft Visual Studio\2022\Community\Common7\Tools\VsDevCmd.bat" -arch=x64
This command sets up the Visual Studio Developer Command Prompt environment for building 64-bit applications.
Or ......
Just search x64 Native Tools Command Prompt for VS 2022 in windows start, this one already has the developer environment ready 🤣

Now we have the command prompt open, let's execute the series of commands we just talked about.
Frist, we need to go to the depot_tools folder,
for me it is at C:\dependencies\depot_tools, so
cd c:\dependencies\depot_tools
then, execute
gclient sync
this command may print some error in the end like Error: client not configured; see 'gclient config', this is fine and can be ignored.
now we need to go to the Skia folder, for me it is at C:\dependencies\skia, so
cd c:\dependencies\skia
then we execute
set GIT_EXECUTABLE=git.bat
and then
python3 tools/git-sync-deps
now, this command will take a while to run ... and it is very likely that will fail due to
error: RPC failed; HTTP 429 curl 22 The requested URL returned error: 429. This means GitHub is limiting our requests, aka. rate-limiting. And the fix is ... well, wait a bit then run the command again! 😆
Anyway, the error may looks something like this
remote: [type.googleapis.com/google.rpc.RequestInfo]
remote: request_id: "b8224f589c084060be3412e118f606f4"
fatal: unable to access 'https://chromium.googlesource.com/angle/angle.git/': The requested URL returned error: 429
...skia\third_party/externals/libjxl > a205468bc5d3a353fb15dae2398a101dff52f2d3
...ia\third_party/externals/freetype > 66a04dd6f858e92766d77deda44a6d8d5dfee5bc
...skia\third_party/externals/brotli > 6d03dfbedda1615c4cba1211f8d81735575209c8
...ia\third_party/externals/harfbuzz > 4cfc6d8e173e800df086d7be078da2e8c5cfca19
...\skia\third_party/externals/icu4x > bcf4f7198d4dc5f3127e84a6ca657c88e7d07a13
...ia\third_party/externals/perfetto > 93885509be1c9240bc55fa515ceb34811e54a394
...es\skia\third_party/externals/icu > a0718d4f121727e30b8d52c7a189ebf5ab52421f
...d_party/externals/opengl-registry > 14b80ebeab022b2c78f84a573f01028c96075553
...third_party/externals/swiftshader > bbe6452b420c5ddc4b0fd421b0a3ce271262f4ca
...s\skia\third_party/externals/dawn > bac513d0ae286600ea0f75a75223a5b52a198b9b
...hird_party/externals/unicodetools > 66a3fa9dbdca3b67053a483d130564eabc5fe095
Traceback (most recent call last):
  File "c:\dependencies\skia\tools\git-sync-deps", line 279, in <module>
    exit(main(sys.argv[1:]))
         ^^^^^^^^^^^^^^^^^^
  File "c:\dependencies\skia\tools\git-sync-deps", line 267, in main
    git_sync_deps(deps_file_path, argv, shallow, verbose)
  File "c:\dependencies\skia\tools\git-sync-deps", line 237, in git_sync_deps
    multithread(git_checkout_to_directory, list_of_arg_lists)
  File "c:\dependencies\skia\tools\git-sync-deps", line 254, in multithread
    raise Exception("Thread failure detected")
Exception: Thread failure detected
You may also notice some lines mentioning
Failed to read environment variable <something something>, these can be ignored too.
After this, execute
python3 bin/fetch-ninja
Now last step before we compile Skia, we need to generate build configuration for Skia using Generate Ninja (GN) build system, and store the build files in the out\Release-x64 folder, so execute
gn gen out/Release-x64 --args="is_debug=false is_official_build=true is_trivial_abi=false skia_use_system_expat=false skia_use_system_icu=false skia_use_system_libjpeg_turbo=false skia_use_system_libpng=false skia_use_system_libwebp=false skia_use_system_zlib=false skia_use_freetype=true skia_use_harfbuzz=true skia_pdf_subset_harfbuzz=true skia_use_system_freetype2=false skia_use_system_harfbuzz=false target_cpu=""x64"" win_vc=""C:\Program Files\Microsoft Visual Studio\2022\Community\VC"" extra_cflags=[""-MT""]"
Then compile Skia by executing
ninja -C out/Release-x64 skia modules
Step 6️⃣: Compile Aseprite
If you have successfully compiled Skia, then you are basically already 95% done, and we can finally compile Aseprite 😊.
Now we need to go to the Aseprite source file folder, for me it is C:\dependencies\aseprite
cd c:\dependencies\aseprite
then make a folder for our compiled aseprite, we can named it build
mkdir build
then go to the build folder
cd build
!NOTE
We should be in the same command prompt as we used for compiling Skia. If for some reason you have closed it, then open it again by searching
x64 Native Tools Command Prompt for VS 2022
in windows start, or execute
call "C:\Program Files\Microsoft Visual Studio\2022\Community\Common7\Tools\VsDevCmd.bat" -arch=x64
in acmdcommand prompt.
Now we need to configures the Aseprite build system to use the Skia library we compiled as the graphics backend and sets up the build environment and generates Ninja build files. Execute
cmake -DCMAKE_BUILD_TYPE=RelWithDebInfo -DLAF_BACKEND=skia -DSKIA_DIR=C:\dependencies\skia -DSKIA_LIBRARY_DIR=C:\dependencies\skia\out\Release-x64 -DSKIA_LIBRARY=C:\dependencies\skia\out\Release-x64\skia.lib -G Ninja ..
If you have compiled Skia to a different location than what mentioned in this guide, you need to change these variables according to your systems:
- -DSKIA_DIR=your skia source code path
- -DSKIA_LIBRARY_DIR=your skia compiled binaries path
- -DSKIA_LIBRARY=your full path to the actual skia.lib static library
This command may occasionally fail. I tested compiling Aseprite on three different machines, and one of them failed with the following error:
CMake Error at CMakeLists.txt:23 (project):
 Running
  'C:/dependencies/depot_tools/ninja' '--version'
  failed with:
   unknown error
CMake Error: CMAKE_C_COMPILER not set, after EnableLanguage
CMake Error: CMAKE_CXX_COMPILER not set, after EnableLanguage
-- Configuring incomplete, errors occurred!
And this is because cmake can't decide which ninja🥷 to hire, I mean use ... basically this is because there are multiple ninja versions on the systems. If this happens, we can modify our previous command by forcing it to use the version inside the visual studio, like this:
cmake -DCMAKE_MAKE_PROGRAM="C:/Program Files/Microsoft Visual Studio/2022/Community/Common7/IDE/CommonExtensions/Microsoft/CMake/Ninja/ninja.exe" -DCMAKE_BUILD_TYPE=RelWithDebInfo -DLAF_BACKEND=skia -DSKIA_DIR=C:\dependencies\skia -DSKIA_LIBRARY_DIR=C:\dependencies\skia\out\Release-x64 -DSKIA_LIBRARY=C:\dependencies\skia\out\Release-x64\skia.lib -G Ninja ..
Alright, now we have but one command left for compiling Aseprite, execute
ninja aseprite
This will take a while, so relax ☺️

Aaaaand finally, we have compiled Aseprite! It should be located in the C:\aseprite\build\bin\ folder, though the exact location might vary depending on your system.
There are several files there, you don't necessarily need all of them for running/playing Aseprite, but these are the required ones
- aseprite.exe
- data (entire folder)
- icudtl.dat
Epilogue: Support the Pixel Wizards Behind Aseprite
This guide started with something simple: a dad compiling Aseprite so his kids could draw pixel foxes and bouncing blobs. But it’s also about respect for the people who built this tool.
Aseprite isn’t just software, but it’s a carefully crafted creative tool made by developers who understand artists. Their licensing model is generous: you’re allowed to build it from source, while the official version gives you a polished, supported product. That balance is what makes projects like this sustainable.
Compiling Aseprite from source comes with real trade-offs:
- Manual updates: every new version requires rebuilding
- No installers or auto-updates: so everything is on you
- No official support: you rely on the community
- Personal use only: no redistribution or commercial use without a license
So if this guide helped you, the best way to give back is simple:
- Buy a license if you use Aseprite seriously
- Recommend it to other artists and developers
- Support the team that keeps it alive
Every license helps ensure Aseprite continues to grow, for hobbyists, families, and professionals alike.